Vidu AI is a powerful new tool for generating videos from text and images. As it enters the market, it positions itself as a competitor to other video generation tools like Sora AI, Runway ML, and Pikalabs. This guide will walk you through how to use Vidu AI’s text-to-video and image-to-video features, showing you how to get the most out of this innovative tool.
Getting Started with Vidu AI
To begin using Vidu AI, visit their website and sign up for an account at https://www.vidu.studio. After signing up, you’ll receive 80 credits per month with the free plan. These credits allow you to generate videos, with each operation consuming a certain number of credits.

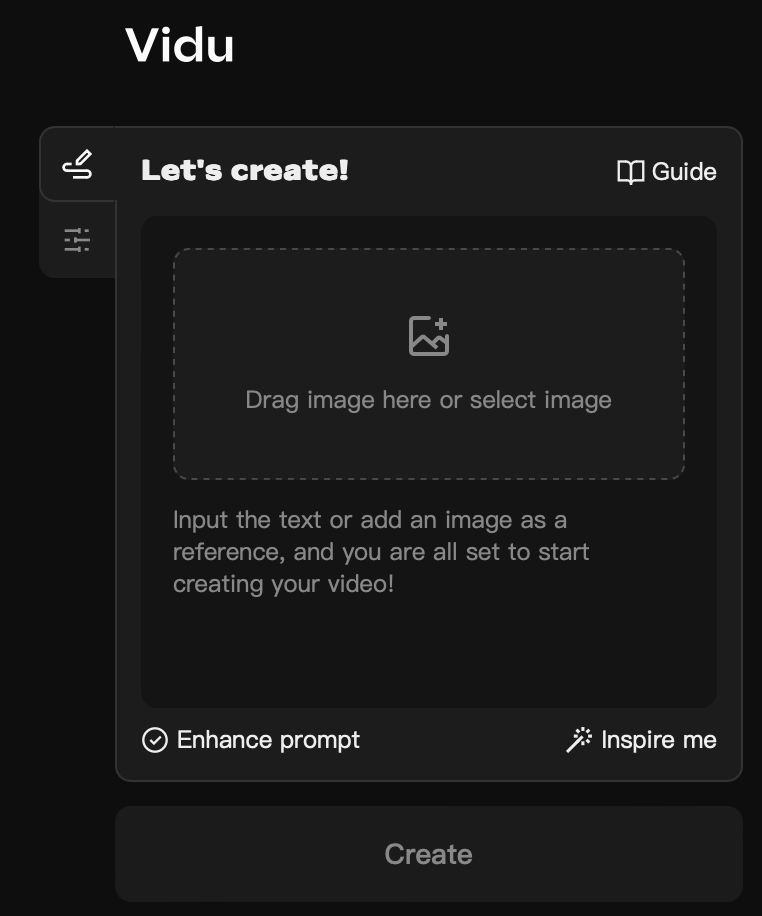
Once you’re signed up, you can start creating videos. If you don’t have a specific idea, click the “Inspire Me” button for prompt suggestions.

For an enhanced experience, you can use the “Enhance Prompt” option, which costs an additional four credits. The video generation process is quite fast, and you’ll see your video in real time without having to wait long.
Exploring Text-to-Video Features
Vidu AI’s text-to-video feature is quite impressive. To test it out, try generating a video based on a text description, such as:
“Capture a serene moment featuring a baby Corgi swimming gracefully in a large, sunlit pool. The underwater perspective showcases the puppy, its gentle smile illuminated by soft, golden hour lighting that filters through the water, creating a dance of light and shadow on the pool’s bottom. The scene is set in soft pastel colors, enhancing the dreamlike, ethereal quality of the atmosphere. The high-resolution photography captures every delicate detail of the water’s texture and the Corgi’s joyful expression, creating a simple yet cinematic portrait of tranquility and innocence. This minimalist yet emotive setup conveys a sense of calm and happiness, ideal for a serene and visually captivating film sequence”
Although initial results may show some flaws, like unnatural leg movements, the upscaling feature can significantly improve the video. After upscaling, you’ll notice better resolution and stabilization, making the video look more professional.
To get the best results, experimenting with different prompts and using the upscaling feature can help refine your videos. The tool shows great potential, with the ability to produce high-quality content that could be used as stock footage.
Using Image-to-Video Conversion
The image-to-video feature allows you to turn static images into dynamic videos. Start by selecting an image, such as a picture of a dog, and choose the “Use as First Frame” option. The tool will generate a video where your chosen image serves as the initial frame. You can also upscale the video to enhance its resolution and stabilization.
For a more varied experience, try using different images. For example, generating a video from a cat skydiving image can show how the tool handles different scenes. Comparing the results from various images helps you understand the tool’s capabilities and its potential for creating engaging video content.
Pricing and Plans
Vidu AI offers three pricing plans: Standard, Advanced, and Premium. Each plan provides different levels of access and features. The free plan is great for getting started, while the paid plans offer additional credits, advanced features, and higher video quality.
You can try Vidu AI for free, which allows you to explore its features before committing to a paid plan. Visit their website to view detailed pricing information and choose the plan that best fits your needs.
Explore Vidu AI today to unlock the potential of AI-driven video creation. For more details and to get started, check the link in the description.
Read more articles in our Blog.

